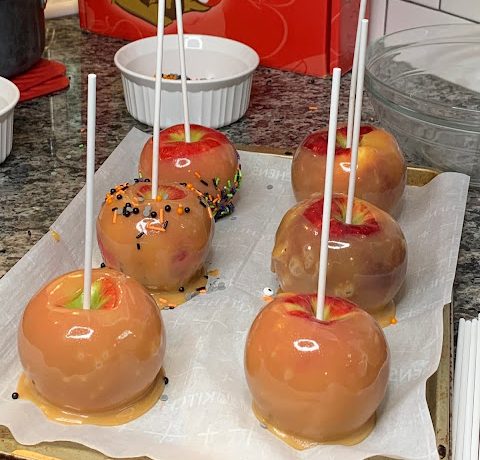
Kansas City Mama’s Caramel Coated Pazazz Apples
INGREDIENTS
Caramel Apples
Two Sticks or 1 Cup of Butter
1 1/2 Cups of Brown Sugar
1 1/4 Cup of Light Corn Syrup
One 14 oz can of Sweetened Condensed Milk
1 1/2 Tablespoons of Vanilla
9 Pazazz Apples
DIRECTIONS
Add all of your ingredients to your pot, minus the vanilla, making sure your pot is large enough for all the contents to boil and for dipping your apple later on. Bring the beginnings of your caramel mixture to a boil and then add your candy thermometer. And I hate to say it, but you will need a candy thermometer for this. A regular cooking thermometer won’t work. Place your thermometer along the side of the pot, making sure it doesn’t touch the bottom. That will provide an inaccurate reading. Just make sure it’s resting just slightly inside the caramel. Bring the thermometer to between 245 and 250 degrees. This can take up to 20 minutes are so, so be prepared for a bicep cramp!!
(Here’s a little tip. Spray your measuring cup with cooking spray before adding your corn syrup. It will pour out of the cup with ease!)
After the caramel has come to a hard boil, and reached 250 degrees, it’s time to remove it from the stove. Add your vanilla and stir to combine.
Now, it’s showtime! You must act quickly. The caramel will only harden and set the longer it’s off the heat. I make sure to have my prep station setup before hand. You won’t regret it.
I place my pot of caramel on a trivet or hot pad, place all of my add-ons to the side of caramel for quick dipping, and a parchment lined tray to the side of that. Now it’s time to dip! PLEASE BE CAREFUL!!! I have burned myself on the caramel before and had one of the worst burns I’ve ever! This stuff is hot!! I think this is definitely an adults only step. Okay, now that that’s out of the way, let’s dip!
Submerge your apple in the caramel and swirl until all sides, and as much of the top as you can get, are covered in caramel. Remove and allow the excess to run off. I continue to swirl the apple to coat the whole thing and to help the removal process move along quicker. Once you feel you have all the caramel off, place it on the parchment paper. Continue this process until all apples are coated in the caramel. If you are using sprinkles, or any other add-ons, dunk the apple into the add-on just after the caramel process. Again, act fast. The caramel hardens quickly and the sprinkles may not stick. I had this happen as well, but don’t worry, I’ve got a few tricks to share on how to cover up any “mistakes”.
Place the apples in the fridge to set. I usually allow at least 30 minutes or more.
If you are happy with your apples, great! Leave them be! If you are like me, and not super pleased with the sprinkle placement, never fear! I used chocolate candy coating for this fix! Candy coating melts come in a wide array of colors and I just happened to have green and purple on hand. To use, melt them in the microwave at 30 second intervals until melted. You can add shortening or coconut oil to make it smooth and glossy. I’ve used booth. Once melted, and pourable, it’s time to apply. I use a fork for this, but you can also use a toothpick. Just add the candy coating to your fork or toothpick and drizzle. Back and forth. In a zigzag pattern. Whatever works for you. And turn the apple while doing so. Once you have the amount of candy coating you want, add the sprinkles! And voila! You have the most darling caramel apple with sprinkles!
By: Andrea of Kansas City Mama